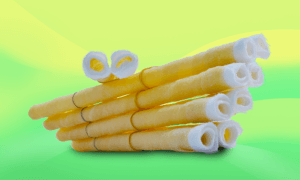

> 2 piece All Natural Australian hand rolled.
> Helps relieve conditions effecting the Ears, Nose and Throat.
> Overcomes painful ear Infections.
> Helps relieve migraines, insomnia and sinusitis.
> Improves balance
> Ear candling is a simple non-intrusive do-it-yourself remedy.
> Using the finest quality West Australian beeswax.
Product details of Australian handmade Ear Candles from the finest beeswax
Just Simply Health’s Ear Candles are hand rolled in Australia from 100% natural beeswax and pure cotton.
Ear candles have been used by ancient cultures for centuries to help relieve conditions effecting the Ears, Nose and Throat.
Ear candling is a simple non-intrusive do-it-yourself remedy.
Simply follow the instructions step by step inside the package.
The colour of the ear candles may vary slightly depending on the season and the trees & bushes in flower.
HOW DOES IT WORK
The hollow candle acts as a kind of chimney. The end of the candle with the cotton visible is lit and the tapered end gently inserted into the ear.
While the ear candle burns, the heat from the flame causes a mild suction or vacuum.
Vapour circulates the ear helping to draw out excess wax and debris which is then deposited at the base of the ear candle or drawn into the flame and burnt.
Each candle burns for 15-20 minutes.
HOW TO USE INSTRUCTIONS:
Always have a partner hold the ear candle whilst candling your ears.
Some people have reportedly fallen asleep or become very relaxed during ear candling.
1. You will need one pair of Just Simply Health Ear Candles, matches, a small towel, a glass of water and a friend.
2. Lie down in a comfortable position on your side. Ensure that there is no draught – close windows, doors etc.
3. Cover the area around the ear with the small towel.
4. Light the ear candle and gently insert the tapered end, using a gentle twisting action.
5. Rest hand lightly on the side of the head, supporting the ear candle in a vertical position.
6. As the candle burns, a vacuum is created, drawing out debris and relieving pressure.
7. Allow the candle to burn no further than the Green Line.
8. Crackling & hissing sounds may be heard. The flame may become high and send of black smoke from the top, this indicate debris being drawn into the candle. If grey smoke appears from between the candle & the ear, reposition the candle.
9. Remove the ear candle and extinguish in water.
10. Repeat for other ear.
11. Place a small ball of cottonwool in the ears after ear candling, to retain the warmth generated by the candle.